
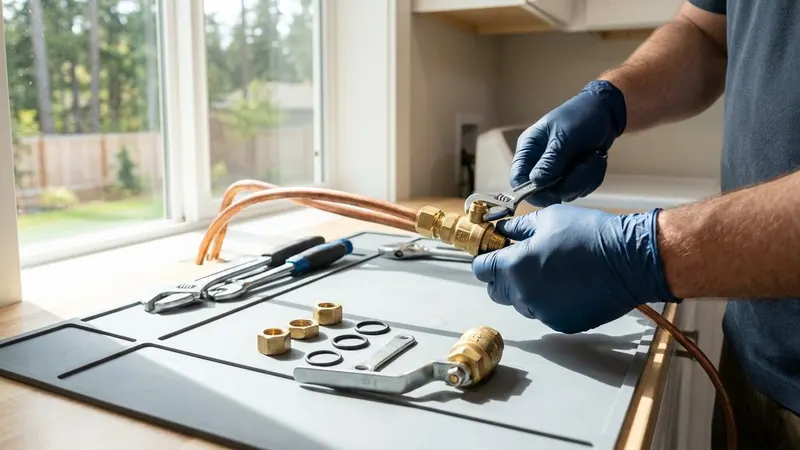
Valves are the unsung heroes of our homes and buildings. They control the flow of water, gas, and other essential fluids, keeping our systems running smoothly. But like any hardworking component, they need a little TLC now and then. That’s where valve servicing comes in.
To service a valve, you’ll need to shut off the main supply, disassemble the valve, clean or replace worn parts, and reassemble it carefully. It might sound tricky, but with the right tools and a bit of know-how, you can tackle this job like a pro. I’ve serviced countless valves in my time, from simple shut-off valves to complex HVAC service valves, and I’m here to guide you through the process.
In this post, I’ll walk you through the steps to service different types of valves, including those in your plumbing and HVAC systems. We’ll cover everything from identifying valve problems to finishing up the job. By the end, you’ll have the confidence to keep your valves in tip-top shape, saving you money on repairs and keeping your systems running efficiently.
Key Takeaways
- Regular valve maintenance prevents leaks and extends system lifespan
- Proper tools and safety precautions are crucial for successful valve servicing
- Different valve types require specific servicing techniques
Understanding Service Valves
Service valves are the unsung heroes of HVAC systems. I’ve seen countless techs struggle with these little guys, but once you get the hang of them, they’re a breeze to work with. Let’s break down the basics so you can tackle them like a pro.
Types of Service Valves
In my years on the job, I’ve come across a variety of service valves. The most common are two-position and three-position service valves. Two-position valves are your basic on/off deal - simple but effective. Three-position valves give you more control, with a mid-setting that’s handy for system checks.
I’ve also worked with ball-type valves, which are a favorite of mine for their smooth operation. Then there’s the king valve - the big daddy of service valves. It’s usually found near the compressor and controls the main refrigerant flow.
Don’t forget about liquid and suction valves. These work together to manage refrigerant flow in different parts of the system. Liquid valves handle the high-pressure liquid refrigerant, while suction valves deal with the low-pressure gas returning to the compressor.
Anatomy of a Service Valve
Let’s get our hands dirty and look at what makes up a service valve. The main body houses the valve stem - that’s the part you’ll be turning. Most valves have a cap to keep dirt out, and trust me, you’ll want to keep that cap on when you’re not working on it.
You’ll find ports on the valve body. These are your access points for gauges and other tools. Some valves have multiple ports, which can be a real time-saver when you’re doing diagnostics.
The valve seat is where the magic happens. It’s the part that actually stops or allows flow when you turn the stem. A good seal here is crucial for preventing leaks.
Valve Functions in HVAC Systems
Now, why do we need these valves? They’re not just there to look pretty. Service valves are critical for maintenance and troubleshooting. I use them to isolate parts of the system when I’m doing repairs or charging refrigerant.
They also act as safety devices. If there’s a leak or other issue, you can shut off the valve to prevent further damage. It’s like having an emergency brake for your HVAC system.
During normal operation, these valves regulate refrigerant flow. They help maintain the right pressure and temperature throughout the system. Without them, your HVAC would be about as useful as a screen door on a submarine.
Safety Precautions and Preparations
I’ve seen too many technicians get hurt by skipping safety steps. Trust me, it’s not worth the risk. Let’s talk about how to protect yourself and identify the right valves before you start any service work.
Personal Protective Equipment
First things first - gear up! I always start by putting on my safety glasses. They’ve saved my eyes more times than I can count. Gloves are next - thick ones that can handle sharp edges and protect against chemicals.
For HVAC work, I make sure I’ve got my respirator handy. Refrigerant leaks can be nasty business, and you don’t want that stuff in your lungs.
Don’t forget ear protection if you’re working around noisy equipment. And sturdy shoes with good traction are a must - I’ve slipped on one too many greasy floors in my day.
Service Valve Identification
Now, let’s talk about finding the right valve. I always start by tracing the refrigerant lines. Look for valves at key points in the system - usually near the compressor or evaporator coil.
For HVAC service valves, you’ll typically see two types: Schrader valves (like on your car tires) and ball valves. I always double-check the valve type before I start working. Using the wrong tools can damage the valve or cause a refrigerant leak.
Before touching any valve, I make sure the system is powered down and pressure is released. It’s a crucial step that too many folks skip. Remember, safety first!
Tools and Equipment for Valve Servicing
When I’m getting ready to service a valve, I always make sure I’ve got the right tools for the job. Having the proper equipment makes the work smoother and helps me avoid damaging any parts.
Must-Have Tools
First things first, I never start a valve job without my trusty adjustable wrench. It’s like an extension of my hand at this point. I also keep a set of screwdrivers handy - both flathead and Phillips. You’d be surprised how often you need ‘em.
A pair of needle-nose pliers is a lifesaver for those tight spots. And don’t forget about safety - I always wear gloves and safety glasses. Trust me, you don’t want any nasty surprises when you’re elbow-deep in a valve.
For cleaning, I swear by a wire brush and some good degreaser. It’s amazing how much gunk can build up over time. A flashlight is another must-have. I can’t tell you how many times good lighting has saved my bacon.
Refrigerants and Gauges
Now, when I’m dealing with refrigeration valves, things get a bit more specialized. Refrigeration gauges are absolutely crucial. They help me check pressure and temperature, which is key for diagnosing issues.
I always make sure I’ve got the right refrigerant on hand. Using the wrong type can cause serious damage, so I double-check every time. Safety first, folks!
A metering device is another tool I wouldn’t be caught without. It helps me control the flow of refrigerant, which is pretty darn important for the system to work right.
Lastly, I keep a leak detector in my kit. It’s saved me countless hours of headaches trying to find tiny leaks by eye or ear. Trust me, this little gadget is worth its weight in gold.
Servicing Procedures
I’ve seen my fair share of valve issues, and let me tell you, proper servicing can save you a world of headaches. Here’s what you need to know to keep those valves in tip-top shape.
Accessing the Valve
First things first, we gotta get to that valve. I always start by shutting off the water supply - safety first, folks! Next, I’ll close the isolation valves upstream and downstream. This keeps things nice and dry while we work.
Now, let’s get that valve exposed. I’ll remove any covers or insulation, being careful not to damage anything. If it’s in a tight spot, I might need to get creative with my tools. A flexible wrench can be a real lifesaver here.
Don’t forget about the service port if your valve has one. This little guy can be a goldmine for diagnostics and maintenance. I always keep it clean and accessible.
Checking for Leaks
Time to play detective and hunt down those pesky leaks. I start with a visual inspection, looking for any obvious signs of water or corrosion. But sometimes, leaks can be sneaky.
That’s when I break out my leak detection tools. A simple soap solution can work wonders - just apply it around joints and watch for bubbles. For tougher cases, I might use an ultrasonic leak detector.
I pay extra attention to the valve stem and body. These are common culprits for leaks. If I spot any issues, I’ll make a note to address them in the next step.
Adjusting or Changing the Valve
If we’re dealing with minor issues, a bit of adjustment might do the trick. I’ll check the packing nut and tighten it if needed. This can often stop stem leaks in their tracks.
For more serious problems, we might need to replace some parts. I always keep a stock of common replacements like O-rings and seals. When swapping these out, I make sure to use parts that match the valve specs exactly.
If the valve’s beyond repair, it’s time for a full replacement. I’ll carefully remove the old valve, making sure not to damage the surrounding piping. Then, I’ll install the new one, double-checking all connections are tight and secure.
Remember, a well-maintained valve can last for years. Regular check-ups and quick action on small issues can save you from big problems down the line.