
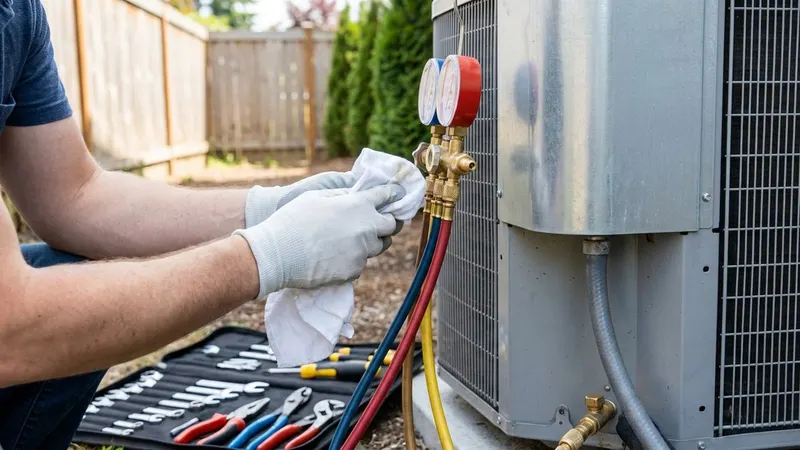
HVAC gauges are the eyes and ears of any heating and cooling pro. But just like any tool, they need some TLC to keep working right. I’ve been in this game for years, and I can tell you that clean gauges are happy gauges. To clean your HVAC gauges, you’ll want to purge them with nitrogen, flush with alcohol, and dry them out completely. It’s not rocket science, but it does take a bit of know-how.
Now, you might be thinking, “Can’t I just wipe ’em down and call it a day?” Not if you want accurate readings, my friend. Over time, oil and debris can build up inside those gauges, throwing off your measurements and potentially leading to some costly mistakes. That’s why a good cleaning routine is as important as your morning coffee.
I’ve seen too many techs ignore their gauges until it’s too late. Don’t be that guy. With a little elbow grease and the right technique, you can keep your gauges in tip-top shape. Trust me, your future self (and your customers) will thank you. Let’s roll up our sleeves and get those gauges gleaming.
Key Takeaways
- Regular cleaning of HVAC gauges ensures accurate readings and prevents costly errors
- Purging with nitrogen and flushing with alcohol are key steps in the cleaning process
- Proper maintenance extends the life of your gauges and improves job performance
Understanding HVAC Gauges
HVAC gauges are essential tools for diagnosing and maintaining heating and cooling systems. I’ve used these gadgets countless times in my career, and they’re a real lifesaver when it comes to keeping things running smoothly.
Types of Gauges
There are two main types of HVAC gauges I work with: analog and digital. Analog gauges have been around forever and are still popular. They’ve got those classic round dials with needles that move as pressure changes. I like ’em because they’re rugged and don’t need batteries.
Digital gauges are the new kids on the block. They give precise readings and can even calculate superheat and subcooling. Some fancy models connect to your smartphone for easy data logging. Pretty nifty stuff!
Manifold gauges are the most common type you’ll see. They’ve got two gauges – one for high pressure and one for low pressure. These babies are perfect for checking refrigerant levels and diagnosing system issues.
Purpose and Function
The main job of HVAC gauges is to measure pressure in the refrigerant lines. This tells me if the system is charged correctly and helps spot problems like leaks or blockages.
Here’s what I look for:
- Low-side pressure: Tells me about the evaporator and compressor suction
- High-side pressure: Gives info on the condenser and compressor discharge
I use these readings to:
- Check refrigerant charge
- Diagnose compressor issues
- Verify proper system operation
HVAC manifold gauges also let me add or remove refrigerant. The valves on the gauges control the flow, making it easy to adjust the charge. It’s a real time-saver when I’m servicing units in the field.
Preparation for Cleaning
Before we dive in, let’s get our ducks in a row. Cleaning HVAC gauges isn’t rocket science, but it does require some prep work to do it right and stay safe.
Safety First
I’ve seen too many folks rush into jobs without proper safety gear. Don’t be that guy. When cleaning HVAC gauges, you’re dealing with chemicals and potentially harmful residues. Always wear safety glasses to protect your eyes from splashes. Gloves are a must too – I prefer nitrile for chemical resistance. If you’re working in a poorly ventilated area, slap on a respirator mask. Better safe than sorry, trust me.
- Safety glasses
- Nitrile gloves
- Respirator mask (if needed)
Remember, these gauges have been exposed to refrigerants. Make sure you’re in a well-ventilated area before you start. Open windows or work outside if you can.
Gathering Your Tools and Materials
Now let’s talk tools. You’ll need a few key items to get those gauges squeaky clean:
- Isopropyl alcohol (91% or higher)
- Soft-bristled brush
- Microfiber cloths
- Clean caps for ports
- Small container for soaking
I like to use isopropyl alcohol because it cleans effectively and evaporates quickly. A soft brush helps dislodge gunk without scratching. Microfiber cloths are great for wiping without leaving lint behind.
Don’t forget to grab some clean caps for your gauge ports. You’ll want to protect them after cleaning. A small container comes in handy for soaking parts if needed.
The Cleaning Process
Cleaning HVAC gauges is a crucial maintenance task that keeps your equipment accurate and reliable. Let’s dive into the nitty-gritty of getting those gauges sparkling clean and ready for action.
Disassembling the Gauges
First things first, I always start by taking apart my gauges. It’s not as scary as it sounds, trust me. I carefully remove the face plate and any other removable parts. Be gentle here – these are precision instruments, not hammers.
I lay out all the pieces on a clean workspace. It’s like a puzzle, but way more expensive if you lose a piece. I make sure to keep track of where everything goes. A quick photo on my phone can be a lifesaver when it’s time to put it all back together.
Cleaning out gauges isn’t just about looks – it’s about keeping your readings accurate. Dirt and grime can mess with your measurements, and in this business, accuracy is everything.
Cleaning the Manifold Gauges
Now for the fun part – actually cleaning these bad boys. I use a gentle cleaner specifically made for HVAC equipment. No harsh chemicals here – we’re not stripping paint off a car.
I use a soft brush to get into all the nooks and crannies. It’s like giving your gauges a spa day, but with more elbow grease. Pay special attention to the face of the gauge – that’s where you’ll be reading from, after all.
For stubborn grime, I might use a bit of rubbing alcohol. It cuts through the tough stuff without damaging the delicate parts. Remember, we’re aiming for clean, not squeaky clean. There’s no need to go overboard.
Dealing with Hoses
The hoses are often the dirtiest part of the whole setup. They’ve seen the inside of more units than I care to count. I start by flushing them out with nitrogen. It’s like power washing, but for tiny tubes.
For really grimy hoses, I might soak them in a mild detergent solution. Just don’t forget to rinse them thoroughly afterwards. Nobody wants soapy refrigerant.
Lastly, I always check the hoses for any signs of wear or damage. A leaky hose is about as useful as a screen door on a submarine. If they’re looking rough, it’s better to replace them now than have a problem on the job later.