
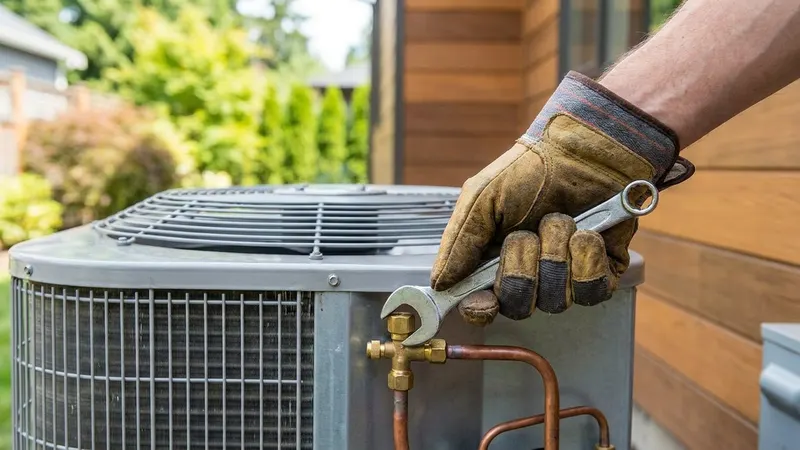
Ever wonder how your AC keeps running smoothly? It’s all thanks to a little device called the service valve. These unsung heroes of HVAC systems play a crucial role in keeping your home cool and comfortable.
Service valves are the gatekeepers of your air conditioning unit. They allow technicians to access the refrigerant lines for maintenance, testing, and repairs without losing the system’s charge. Think of them as the airlocks on a spaceship – they let us work on the system without letting all the good stuff escape.
I’ve seen my fair share of service valves in my years working on HVAC systems. They may look simple, but these valves are engineering marvels. They have multiple positions that control the flow of refrigerant, making them essential for proper AC functioning. Without them, keeping your AC in top shape would be a real headache.
Key Takeaways
- Service valves control refrigerant flow in AC systems
- They enable technicians to perform maintenance without losing refrigerant charge
- Regular inspection of service valves helps prevent leaks and system inefficiency
Understanding Service Valves
Service valves are crucial components in HVAC and refrigeration systems. They allow technicians like me to access, control, and maintain these systems efficiently. Let’s dive into the nitty-gritty of these essential devices.
Definition and Types of Valves
Service valves are specialized fittings that give us access to closed refrigeration systems. I’ve worked with many types over the years, but the most common are two-position and three-position valves. Two-position valves are simpler, with just open and closed settings. Three-position valves are more versatile, offering a mid-position for system isolation.
Ball-type valves are popular in newer installations. They’re easy to operate and provide a tight seal. King valves, also known as main shut-off valves, are larger and control the entire system’s flow.
In my experience, brass service valves are the most durable. They resist corrosion and stand up to the tough conditions inside AC and refrigeration systems.
Components and Construction
The main parts of a service valve are the valve body, stem, and sometimes a ball or seat. The body is typically made of brass or steel for durability. I’ve seen countless valve stems – they’re the part you turn to open or close the valve.
Here’s a quick breakdown of the key components:
- Valve body: Houses internal parts
- Stem: Controls valve position
- Seat: Creates the seal
- Port: Access point for tools
Ball valves use a perforated ball instead of a traditional stem and seat. I find them easier to maintain and less prone to leaks.
Function in Refrigeration and HVAC
In AC systems, service valves are my go-to for diagnostics and maintenance. They let me check pressures, add refrigerant, and isolate components. Without them, servicing these systems would be a nightmare.
For refrigeration systems, service valves play a similar role. They’re critical for charging the system and performing leak tests. I use them to evacuate systems before recharging, ensuring everything’s running smoothly.
In HVAC installations, service valves are placed strategically. You’ll find them on compressors, condensers, and sometimes evaporators. They’re my first stop when troubleshooting issues or performing routine maintenance.
Working Principles
Service valves are the unsung heroes of HVAC systems. I’ve seen firsthand how these little workhorses keep our air conditioners and refrigerators running smoothly. Let me break down the key ways they get the job done.
Refrigerant Flow Control
When I’m working on an AC unit, I rely on service valves to manage refrigerant flow like a pro. These valves act as gatekeepers, controlling how much refrigerant enters different parts of the system.
I can adjust the valve to fine-tune the flow, which is crucial for system efficiency. Too much refrigerant? I’ll dial it back. Not enough? I’ll open it up a bit more. It’s all about finding that sweet spot for peak performance.
The valve’s design is pretty clever. It uses a stem that moves up and down to open or close the passage. When I need to charge the system, I connect my refrigerant tank right to the service valve. Easy peasy!
Pressure Regulation and Measurement
Pressure is the name of the game in HVAC, and service valves are my go-to for keeping it in check. These valves have ports where I can hook up my refrigeration gauges to measure pressure throughout the system.
I use these readings to diagnose issues and make sure everything’s running as it should. High pressure could mean a blockage, while low pressure might indicate a leak. Either way, the service valve gives me the info I need to fix it.
Some valves even have built-in pressure relief functions. If things get too hot and heavy in there, they’ll automatically release some pressure to prevent damage. It’s like having a safety net for your HVAC system.
Isolation and Maintenance Functions
When it comes to maintenance, service valves are a real lifesaver. They let me isolate different parts of the system so I can work on them without losing all the refrigerant.
I can shut off the flow to the compressor or evaporator, swap out parts, and get everything back up and running in no time. It’s like being able to put a tourniquet on your AC system – stopping the flow where you need to without shutting down the whole operation.
These valves also make it a breeze to recover refrigerant when needed. I just hook up my recovery machine and let it do its thing. It’s all about making the job easier and more efficient, which is something I always strive for.
Installation and Setup
Getting service valves set up right is key. I’ve seen too many HVAC pros rush this step and end up with leaky systems. Let’s break down how to do it right.
Integrating Valves into Systems
I always start by picking the right spot for the valve. You want easy access for maintenance down the road. I like to use a push-fit service valve when I can – they’re a breeze to install without extra tools.
For copper pipes, I’ll sweat the valve in place. Here’s my process:
- Clean the pipe
- Apply flux
- Heat evenly
- Add solder
- Let it cool slowly
Don’t forget to check for leaks once it’s set. A little soapy water does the trick.
Receiver Tank and Charging
Now for the tricky part – getting the refrigerant levels just right. I always hook up my gauges to check pressure before I start.
Overcharging is bad news, folks. It can damage your compressor and waste energy. I use the receiver tank to store extra refrigerant. It acts like a buffer.
Here’s how I charge the system:
- Evacuate air with a vacuum pump
- Open the liquid line valve slowly
- Monitor pressure and temperature
- Add refrigerant in small amounts
I keep a close eye on those gauges. When the pressures level out, I know we’re good to go.